Latest

Level Generation Tool

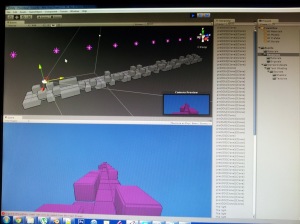
So I have been progressing with the new game idea for the last few months. I have only been able to work on it late nights, and that’s if I really feel up to it after working during the day. Anyways, enough with the complaining. More Game Development. So an update… an update… yes…….. WELL! Those that have seen on my google+ account, I have posted little pictures of my development progress…. There I talked a little about properly implementing my version of procedural level design. As there are, I am sure, many paths I could take in developing my “random” level generation. I have chosen a simple yet I feel elegant way about generating the “first bit” of the level. This being probably the first 2 minutes into the game. Then I will probably start generation again after a short period of that time has expired. Anyways, a picture would help with my explanation.


As this picture below is me prototyping, this isn’t exactly how the game will look in the end.

Random

This “screen picture” was taken after I had perfected “so far” the algorithm. I was needless to say happy about it. “But doug this is just one platform where are the other three??” Well my good friend, like I said, this was just prototyping. So I have now moved on to actually making all the chunks in the game that will populate my arrays! So I started doing this only to find that this was extremely slow. Like VERY slow. I would go into blender modeling tool. And… model away…. Yeah… after about a few hours of that I was like… This will take my forever! So me being lazy decided to make a tool that would allow me to model within my game engine. After a bit of research, and some frustration I have a working modeling tool, I made, that I am happy with. This way I can quickly break and spawn my special blocks in with just a simple click… Those familiar with minecraft will know what I am talking about. This method will speed up my workflow and make things more optimized! Which is a plus 😉 RIGHT?!

So I did make a video of this but am somewhat reluctant to post since I sound, well, tired and, groggy. Funny… it being 1 am or so when I did it. Okay okay, I’ll post it. Just below here. So anyways, now that I have this modeling tool going, the next step is making all of my platforms and then coding them to show up in a random fashion that makes the game fun and interesting! Then onto Hit detection and Raycasting of characters and such. I won’t give too much away. Enjoy.

Anyways, Questions? Ask them below. I’d be happy to answer them.

Tracker Program for music

As a kid that grew up with older brothers playing and programming/fooling around with older Commodore computers (AMIGA, Comm64) I was always amazed at the things you could do with them. One thing that I always wanted to do was to use the amazing program called OctaMED. This was a tracker program where you could make music you heard in the games themselves. This was very interesting to me. As I have been working on my game for the last few months I have also been coming up with music that I would like to add to the game. This is a time consuming process. Luckily, I have lots of ideas already laid out. Sadly I couldn’t find a good tracker program… UNTIL today.

With about 2 hours of fooling around with it I was able to spit out a simple song. Give me a good month and i’ll be able to really have some good stuff I hopefully will be happy with. The program I am working with is called MilkyTracker. I included a screenshot below.

The song in progress

The song in progress

Anyways. This has been a nice break to fool around with the songs I will be including in the game. So now, the decision how many shall I include in the game. I guess it will all come down to how fast and good I can get them out and meshing with the gameplay properly. Anyways, I am going to bed. I am up waaaay to late. ( and too lazy to proof read this post, So I typed this pretty quick and don’t care enough to  read through it ( that’s what proof reading is))


For those interested in the Tracker program I’ll give a link to in below.


http://www.milkytracker.org/

New Game Concept

So this is, again, the second time I am typing this. I think I might start typing stuff out in an external program, as I have lost two big posts to wordpresses web interface. Funny, I am still typing this in that interface. Maybe I am too lazy to even open such a program, as I would take me no time. Anyways, I am going to try and summarize this a bit more. Basically I had a strange idea come to mind right before I was to fall asleep about two weeks ago. I recorded this in my phone and then fell asleep. This idea was then later translated with the help of me drawing it into Photoshop the following day. This is basically the idea that I drew out.

It was to be a 3d third person runner… But not in the sense that most are used to. It would not be just on one plane. It would consist of platforms, as you can see in the picture. The character would avoid blocks and gaps by either moving on the platform jumping over them, or the funner part, is moving to another platform. This would be a fast paced game requiring some good reflexes. Anyways, I took this picture, and started working on a 3d engine and textured blocks to start the actual development of the game. I first created and textured one single block. Once that had taken place, I quickly decided, if I was to make an engine, to build levels in, I would need to make every combination of 3 section block capable. Once that was done, I decided to see how my simple start to my engine looked on a rendered out screen shot. This is what I have to date right now… Although I might need to do some optimization of the engine in some spots, other then that, I am quite happy with how this turned out so far. (refer to the picture below.)

Again as this is still quite early in development, this will most likely change considerably.
Anyways I hope to have more posts on this game as I continue development. Let me know what anyone thinks of the idea for this game. I don’t want to spoil much of the gameplay extras that I will be adding. So you’ll just have to stay tuned to find out more.

Doug.

Matrix Transformation

Well it’s been sometime since I posted. But I thought for those that are interested, I will post a random topic I have been working with. That would be as the title suggests transformation of object via matrix and vector math. So in general there are 3 basic transformations those include: translation, Rotation, and scaling. These are the three that move object through out 3D space. In addition to those, projection transformation is used to go from view space to projection space. The D3DX library contains APIs that can conveniently construct a matrix for many purposes such as translation, rotation, scaling, world-to-view transformation, view-to-projection transformation, etc. An application can then use these matrices to transform vertices in its scene. Conveniently for some an understanding of the math isn’t really required to do some basic stuff. The transformations I am doing will be as such.

So!

Translation

Translation refers to moving or displacing for a certain distance in space. In 3D, the matrix used for translation has the form

    1  0  0  0
    0  1  0  0
    0  0  1  0
    a  b  c  1

Rotation

Rotation refers to rotating vertices about an axis going through the origin. Three such axes are the X, Y, and Z axes in the space. An example in 2D would be rotating the vector [1 0] 90 degrees counter-clockwise. The result from the rotation is the vector [0 1]. The matrix used for rotating ΐ degrees clockwise about the Y axis looks like this:

    cosΐ  0  -sinΐ   0
     0    1     0    0
    sinΐ  0   cosΐ  0
     0    0     0    1

Scaling

Scaling refers to enlarging or shrinking the size of vector components along axis directions. For example, a vector can be scaled up along all directions or scaled down along the X axis only. To scale, we usually apply the scaling matrix below:

    p  0  0  0
    0  q  0  0
    0  0  r  0
    0  0  0  1

where p, q, and r are the scaling factor along the X, Y, and Z direction, respectively. The figure below shows the effect of scaling by 2 along the X axis and scaling by 0.5 along the Y axis.

These three I stated above can be multiplied with each other to combine their effect. This is where you can start to get certain effects and movements  that can get the idea you are trying to get across. I created three cubes in the directx sample I will show. The sample you’ll see will include 1 cube in the middle as a type of planet. and two smaller “moon” cubes orbiting in differing axis and speeds. I will show the main transformation source code below.

void Render()
{
// Update our time
static float t = 0.0f;
if( g_driverType == D3D10_DRIVER_TYPE_REFERENCE )
{
t += ( float )D3DX_PI * 0.0125f;
}
else
{
static DWORD dwTimeStart = 0;
DWORD dwTimeCur = GetTickCount();
if( dwTimeStart == 0 )
dwTimeStart = dwTimeCur;
t = ( dwTimeCur – dwTimeStart ) / 1000.0f;
}

// 1st Cube: Rotate around the origin
D3DXMatrixRotationY( &g_World1, t );

// 2nd Cube: Rotate around origin
D3DXMATRIX mTranslate;
D3DXMATRIX mXTranslate;
D3DXMATRIX mYOrbit;
D3DXMATRIX mXOrbit;
D3DXMATRIX mSpin;
D3DXMATRIX mScale;
D3DXMATRIX m3Scale;
D3DXMatrixRotationZ( &mSpin, -t );
D3DXMatrixRotationY( &mYOrbit, -t * 2 );
D3DXMatrixRotationX( &mXOrbit, -t * 4 );
D3DXMatrixTranslation( &mTranslate, -4.0f, 0.0f, 0.0f );
D3DXMatrixTranslation( &mXTranslate, 0.0f, 3.0f, 0.0f );
D3DXMatrixScaling( &mScale, 0.3f, 0.3f, 0.3f );
D3DXMatrixScaling( &m3Scale, 0.2f, 0.2f, 0.2f );

D3DXMatrixMultiply( &g_World2, &mScale, &mSpin );
D3DXMatrixMultiply( &g_World2, &g_World2, &mTranslate );
D3DXMatrixMultiply( &g_World2, &g_World2, &mYOrbit );

//3rd cube
D3DXMatrixMultiply( &g_World3, &mSpin, &m3Scale );
D3DXMatrixMultiply( &g_World3, &g_World3, &mXTranslate );
D3DXMatrixMultiply( &g_World3, &g_World3, &mXOrbit );
// D3DXMatrixMultiply( &g_World3, &g_World3, &mYOrbit );

//
// Clear the back buffer
//
float ClearColor[4] = { 0.0f, 0.0f, 0.0f, 1.0f }; //red, green, blue, alpha
g_pd3dDevice->ClearRenderTargetView( g_pRenderTargetView, ClearColor );

//
// Clear the depth buffer to 1.0 (max depth)
//
g_pd3dDevice->ClearDepthStencilView( g_pDepthStencilView, D3D10_CLEAR_DEPTH, 1.0f, 0 );

//
// Update variables for the first cube
//
g_pWorldVariable->SetMatrix( ( float* )&g_World1 );
g_pViewVariable->SetMatrix( ( float* )&g_View );
g_pProjectionVariable->SetMatrix( ( float* )&g_Projection );

//
// Render the first cube
//
D3D10_TECHNIQUE_DESC techDesc;
g_pTechnique->GetDesc( &techDesc );
for( UINT p = 0; p < techDesc.Passes; ++p )
{
g_pTechnique->GetPassByIndex( p )->Apply( 0 );
g_pd3dDevice->DrawIndexed( 36, 0, 0 );
}

//
// Update variables for the second cube
//
g_pWorldVariable->SetMatrix( ( float* )&g_World2 );
g_pViewVariable->SetMatrix( ( float* )&g_View );
g_pProjectionVariable->SetMatrix( ( float* )&g_Projection );

//
// Render the second cube
//
for( UINT p = 0; p < techDesc.Passes; ++p )
{
g_pTechnique->GetPassByIndex( p )->Apply( 0 );
g_pd3dDevice->DrawIndexed( 36, 0, 0 );
}

//
// Update variables for the third cube
//
g_pWorldVariable->SetMatrix( ( float* )&g_World3 );
g_pViewVariable->SetMatrix( ( float* )&g_View );
g_pProjectionVariable->SetMatrix( ( float* )&g_Projection );

//
// Render the third cube
//
for( UINT p = 0; p < techDesc.Passes; ++p )
{
g_pTechnique->GetPassByIndex( p )->Apply( 0 );
g_pd3dDevice->DrawIndexed( 36, 0, 0 );
}

//
// Present our back buffer to our front buffer
//
g_pSwapChain->Present( 0, 0 );
}

Any comments would be appreciated.

Thanks for reading.

Doug.

Time Management

Well, as those that follow this have noticed. I haven’t been around for quite sometime. This is due to the fact that having a new born baby takes up time. Though I have had time spent researching new optimization techniques in C++ I haven’t had time to really sit down and actually type some code out. I hope to get this chance sooner then later. But for now I hope to continue to research and eventually get another coding post out on this soon enough.

Never the less, I will try to post on here occasionally for those that are following.


Bye for now.

Direct X Squares and Lighting

Okay So, I actually did this more then a week ago. But decided to include it since well I spent a few hours working out lighting and Squares in 3d space. I was surprised how much trial and error was involved. While this demo video below isn’t perfect since I actually have to figure how much light is needed to bounce off of every side of the square. I ended up understanding but tried for another effect. In the video you’ll see two squares rotating. They have an ambient light lighting them constantly so we can see them, but I included a spot light….

The interesting thing about the spot light is that in direct x, you don’t just say “I want my spot light (X,Y,Z) and facing a certain way”. You actually have to indicate which vectors triangles are going to be lit. That means if I was to set random vectors to be lit, I could get a sort of random effect of light fading in and out of certain sides. While this is nothing really special it give a strange lighting effect. that I somewhat enjoy. Anyways, Why I haven’t been doing much with direct x for the last week as I stated above, was because I have been working on more of my coding  intermediate “basics”. This I am hoping will help me understand more later on down the road. Once I finish this book, I should be back to focusing more on graphical programming, as I need an engine to run my games…

Anyways here is the video.

One other thing is I forgot to deselect the option to record what you are listening to, As I was listening to some music it was recorded as well. It is also quite loud before starting the video turn your speakers down.

If you did like it… The guy is called DNTEL. Very good music to listen to.

Concept drawing

I am no artist.  But of course I have ideas of what I would want my character to look like… like gun, armor and so forth. So I had about an hour or so to use. So I decided to pull out the tablet and see if I could come up with some random art. So I started with just drawing a character from scratch… Trust me you don’t want to see that. It looks terrible. So instead I thought it might be easier for me to break the body up into parts to tackle. So I started with the leg armor, then I did an arm armor, then I finished off with a gun. Since I was thinking of having this take place in the future at some time.  I could easily get away with at little more “imagination”. Anyways I’ll post it below of all to see… AGAIN, I am no artist. But I think I am getting some of my ideas out on “digital” paper. Anyways…

enjoy.

Oh and if are wondering those Chinese characters mean “shell” or what I am more leaning towards is, Instance. (as in a point in time)

(that at least is what Google translate tells me, of course it is probably wrong)

DirectX and a Colorful Triangle

So I think its better if I keep my text short as I have included a video that will explain most of what I have been up to lately. I feel that I am actually making some progress with DirectX (finally) as it is very complex. The neat thing, once you watch the video, is that these principles can be applied to more complex structures and matrix-es. The triangle in the video is simple. I will soon be able to import other objects and then map out keystrokes to camera movement which then would basically emulate player movement. Anyways any questions? Ask away, I’ll try my best.

Oh, I will also include the source code for this, so if you want to fool around with it also. Go right ahead, take it.

VIDEO:


Sorry for the terrible quality. I know you can’t really see anything… this is because vimeo only allows me to upload one HD video per week… sadly I did one right before this one. So… This is what I am stuck with. If you really want to see the video goto the video on vimeo website is there is a HD download version  you’ll just have to download it… It’s not big. Probably like 25 megs or so. Anyways, my apologies.

CODE:

// include the basic windows header files and the Direct3D header file
#include <windows.h>
#include <windowsx.h>
#include <d3d9.h>
#include <d3dx9.h>

// define the screen resolution
#define SCREEN_WIDTH 800
#define SCREEN_HEIGHT 600

// include the Direct3D Library files
#pragma comment (lib, “d3d9.lib”)
#pragma comment (lib, “d3dx9.lib”)

// global declarations
LPDIRECT3D9 d3d;    // the pointer to Direct3D interface
LPDIRECT3DDEVICE9 d3ddev;    // the pointer to the device class
LPDIRECT3DVERTEXBUFFER9 v_buffer = NULL;    // the pointer to the vertex buffer

// function prototypes
void initD3D(HWND hWnd);    // sets up and initializes Direct3D
void render_frame(void);    // renders a single frame
void cleanD3D(void);    // closes Direct3D and releases memory
void init_graphics(void);    // 3D declarations

struct CUSTOMVERTEX {FLOAT X, Y, Z; DWORD COLOR;};
#define CUSTOMFVF (D3DFVF_XYZ | D3DFVF_DIFFUSE)

// the WindowProc function prototype
LRESULT CALLBACK WindowProc(HWND hWnd, UINT message, WPARAM wParam, LPARAM lParam);

// the entry point for any Windows program
int WINAPI WinMain(HINSTANCE hInstance,
HINSTANCE hPrevInstance,
LPSTR lpCmdLine,
int nCmdShow)
{
HWND hWnd;
WNDCLASSEX wc;

ZeroMemory(&wc, sizeof(WNDCLASSEX));

wc.cbSize = sizeof(WNDCLASSEX);
wc.style = CS_HREDRAW | CS_VREDRAW;
wc.lpfnWndProc = WindowProc;
wc.hInstance = hInstance;
wc.hCursor = LoadCursor(NULL, IDC_ARROW);
wc.lpszClassName = L”WindowClass”;

RegisterClassEx(&wc);

hWnd = CreateWindowEx(NULL, L”WindowClass”, L”Spinning Triangle YAAAAHHHH”,
WS_OVERLAPPEDWINDOW, 0, 0, SCREEN_WIDTH, SCREEN_HEIGHT,
NULL, NULL, hInstance, NULL);

ShowWindow(hWnd, nCmdShow);

// set up and initialize Direct3D
initD3D(hWnd);

// enter the main loop:

MSG msg;

while(TRUE)
{
while(PeekMessage(&msg, NULL, 0, 0, PM_REMOVE))
{
TranslateMessage(&msg);
DispatchMessage(&msg);
}

if(msg.message == WM_QUIT)
break;

render_frame();
}

// clean up DirectX and COM
cleanD3D();

return msg.wParam;
}

// this is the main message handler for the program
LRESULT CALLBACK WindowProc(HWND hWnd, UINT message, WPARAM wParam, LPARAM lParam)
{
switch(message)
{
case WM_DESTROY:
{
PostQuitMessage(0);
return 0;
} break;
}

return DefWindowProc (hWnd, message, wParam, lParam);
}

// this function initializes and prepares Direct3D for use
void initD3D(HWND hWnd)
{
d3d = Direct3DCreate9(D3D_SDK_VERSION);

D3DPRESENT_PARAMETERS d3dpp;

ZeroMemory(&d3dpp, sizeof(d3dpp));
d3dpp.Windowed = TRUE;
d3dpp.SwapEffect = D3DSWAPEFFECT_DISCARD;
d3dpp.hDeviceWindow = hWnd;
d3dpp.BackBufferFormat = D3DFMT_X8R8G8B8;
d3dpp.BackBufferWidth = SCREEN_WIDTH;
d3dpp.BackBufferHeight = SCREEN_HEIGHT;

// create a device class using this information and the info from the d3dpp stuct
d3d->CreateDevice(D3DADAPTER_DEFAULT,
D3DDEVTYPE_HAL,
hWnd,
D3DCREATE_SOFTWARE_VERTEXPROCESSING,
&d3dpp,
&d3ddev);

init_graphics();    // call the function to initialize the triangle

d3ddev->SetRenderState(D3DRS_LIGHTING, FALSE);    // turn off the 3D lighting
d3ddev->SetRenderState(D3DRS_CULLMODE, TRUE); // render both sides of the Triangle

}

// this is the function used to render a single frame
void render_frame(void)
{

int R = 0;
int G = 0;
int B = 0;

int xColor = 255;

for ( xColor; xColor <= 255; xColor–)
{
d3ddev->Clear(0, NULL, D3DCLEAR_TARGET, D3DCOLOR_XRGB(R, G, B), 1.0f, 0);

d3ddev->BeginScene();

// select which vertex format we are using
d3ddev->SetFVF(CUSTOMFVF);

// SET UP THE PIPELINE

//D3DXMATRIX matRotateX;    // a matrix Pointers to store the rotation information
//D3DXMATRIX matTranslate;
D3DXMATRIX matRotateY;
//D3DXMATRIX matRotateZ;

static float index = 0.0f; index+=0.05f;    // an increasing float value
static float zoom = 45.0; zoom-=0.05f;
// build a matrix to rotate the model based on the increasing float value
//D3DXMatrixRotationX(&matRotateX, D3DXToRadian(-90));
D3DXMatrixRotationY(&matRotateY, index);
//D3DXMatrixTranslation(&matTranslate,0.0f, index, 0.0f);
//D3DXMatrixRotationZ(&matRotateZ, index);

// tell Direct3D about our matrix
d3ddev->SetTransform(D3DTS_WORLD, &matRotateY);

D3DXMATRIX matView;    // the view transform matrix

D3DXMatrixLookAtLH(&matView,
&D3DXVECTOR3 (0.0f, 0.0f, 20.0f),    // the camera position
&D3DXVECTOR3 (0.0f, 0.0f, 0.0f),    // the look-at position
&D3DXVECTOR3 (0.0f, 1.0f, 0.0f));    // the up direction

d3ddev->SetTransform(D3DTS_VIEW, &matView);    // set the view transform to matView

D3DXMATRIX matProjection;     // the projection transform matrix

D3DXMatrixPerspectiveFovLH(&matProjection,
D3DXToRadian(zoom),    // the horizontal field of view
(FLOAT)SCREEN_WIDTH / (FLOAT)SCREEN_HEIGHT, // aspect ratio
1.0f,    // the near view-plane
200.0f);    // the far view-plane

d3ddev->SetTransform(D3DTS_PROJECTION, &matProjection);    // set the projection

// select the vertex buffer to display
d3ddev->SetStreamSource(0, v_buffer, 0, sizeof(CUSTOMVERTEX));

// copy the vertex buffer to the back buffer
d3ddev->DrawPrimitive(D3DPT_TRIANGLELIST, 0, 1);

d3ddev->EndScene();

d3ddev->Present(NULL, NULL, NULL, NULL);
R++;
}
}

// this is the function that cleans up Direct3D and COM
void cleanD3D(void)
{
v_buffer->Release();    // close and release the vertex buffer
d3ddev->Release();    // close and release the 3D device
d3d->Release();    // close and release Direct3D
}

// this is the function that puts the 3D models into video RAM
void init_graphics(void)
{
// create the vertices using the CUSTOMVERTEX struct
CUSTOMVERTEX vertices[] =
{
{ 3.0f, -3.0f, 0.0f, D3DCOLOR_XRGB(0, 0, 255), },
{ 0.0f, 3.0f, 0.0f, D3DCOLOR_XRGB(0, 255, 0), },
{ -3.0f, -3.0f, 0.0f, D3DCOLOR_XRGB(255, 0, 0), },
};

// create a vertex buffer interface called v_buffer
d3ddev->CreateVertexBuffer(3*sizeof(CUSTOMVERTEX),
0,
CUSTOMFVF,
D3DPOOL_MANAGED,
&v_buffer,
NULL);

VOID* pVoid;    // a void pointer

// lock v_buffer and load the vertices into it
v_buffer->Lock(0, 0, (void**)&pVoid, 0);
memcpy(pVoid, vertices, sizeof(vertices));
v_buffer->Unlock();
}

C++ and DirectX 9

So, Sadly I wrote out a whole post only to have wordpress lose it somehow, So now I am unwillingly typing this post out again. Definitely with less excitement. Though I will try my best to keep it interesting. So I have been working lately with C++ and Less C#. Mainly I have been wanting to learn how to draw with Directx. So as I thought the best way to start making something appear on screen would be through drawing one single pixel to screen. I made it so I could choose colors and make it available to me if I wanted to change these colors, that I could.

Anyways I succeeded, with some reading, in actually drawing a white pixel to the screen, Now I started thinking if I wanted to draw a line to the screen how would I go about this. Have you guessed it. YES! That is correct. I will need to string multiple pixels together to created a line. Now I could have just repeated the code I wrote and changed the pixel coordinates by one every time one is drawn. That would work, but would take a long time. Think about it this way. If you wanted to make a line that was 100 pixels long you would have to copy the code 100 times, change each value 100 times then hope that there isn’t any typos in that code that could introduce bugs. What I am getting at is there is an easier way!

LOOPS!

The for loop is excellent for this. Basically for those that don’t know, A for loop will take value and increment it for however long I want it to go for. (very true to the name, “for loop”). ANYWAYS I stuck the code to draw a pixel into the loop and told it to go for about 200 pixels… this is what I got.

A line drawn.

Yup. pretty boring. But my theory worked. and I am positive this is how it is normally done… At least I think it is. Anyways next I thought it would be cool to resize and manipulate this line just to see how it would react. I know most have heard of the equation Y = mx+b. me too. I didn’t think I needed to know or remember it ever again. Well surprise I do. If I want to Draw “graph” a line that has some sort of slope, I need to use this equation. After some trial and error, I got it to work. I will post the code below for those that are interested. Can you find the equation in the code?! A fun challenge.

Here is another picture of the Line at an angle. One disclaimer, you might be wondering why I am even doing this. Fundamentals my boy! This code can apply to some rather cool things down the road that I will probably hit on later on.

Angled Line

Also Here is a video of the Line movement.

Enjoy.

CODE:

void D3DGraphics::DrawLine( int x1, int y1, int x2, int y2, int r, int g, int bl )
{
int dy = y2 -y1;
int dx = x2 – x1;

if (abs( dy ) > abs ( dx ) )
{
if (y1 > y2)
{
int temp = y2;
y2 = y1;
y1 = temp;
temp = x2;
x2 = x1;
x1 = temp;
}
float m = (float)dx / (float)dy;
float b = x1 – m*y1;
for ( int y = y1; y <= y2; y++)
{
int x = m*y + b + 0.5f;
PutPixel(x,y,r,g,bl);
}
}
else
{
if ( x1 > x2 )
{
int temp = y2;
y2 = y1;
y1 = temp;
temp = x2;
x2 = x1;
x1 = temp;
}
float m = (float)dy / (float)dx;
float b = y1 – m*x1;
for ( int x = x1; x <= x2; x++ )
{
int y = m*x + b + 0.5f;
PutPixel( x,y,r,g,bl );
}
}

}

Epic Space Adventure | Machanics Down

So I have now made about 10 or so Classes to run differing aspects of the game. These range from asteroid movement and collision. Main ship movement and collision and enemy ship movement and collision. I have also made it so that the enemy ships shoot at the player and fly differing patterns. I have also added a title screen and a ugly “HUD” in the game as to show you your current score and lives left.

Basically the game is in working condition, but doesn’t get progressively harder and could last forever, theoretically. I must now come up with some sort of timer that will make the game get harder as your progress. Possibly add some sort of boss fight.

These are some of my other Ideas:

  • Other enemy types with differing styles of “bullets”
  • More asteroids as the game moves along
  • Differing paths that the enemies fly
  • Power ups for the ship

Anyways below is a screen capture of  that I have so far. I might in the near future add the source code and a down-loadable packet for those that want to “try” this mini game.

Image


UPDATE!

 Source Files for Epic Space Adventure